前言:
因為公司某個專案,為了達到即時更新資料,開始研究SignalR。這個專案使用long polling方法,每隔一段時間向WebAPI Server要求資料,無法
達到前端、後端更改資料後,即時真正即時更新的需求,故改用SignalR套件,
來實作即時更新 (real time is so cool ! )。
(但實際效益與伺服器的負載量還需要再深入研究)
這個功能在專案上已經實作完畢,在開始實作前,我有找些教學影片與網站,
自己嘗試連接SignalR的服務,作成一個範例,這篇就是整個範例的實作過程,
除了記錄下來給未來的自己複習,也分享大家參考。
(若有說明或觀念錯誤,歡迎指導)
本篇文章同步發布於個人的blogger與點部落,文章最後有提供範例下載。
文長謹慎。
實作:
實作可以分成三段(可點超連結):後端專案設定
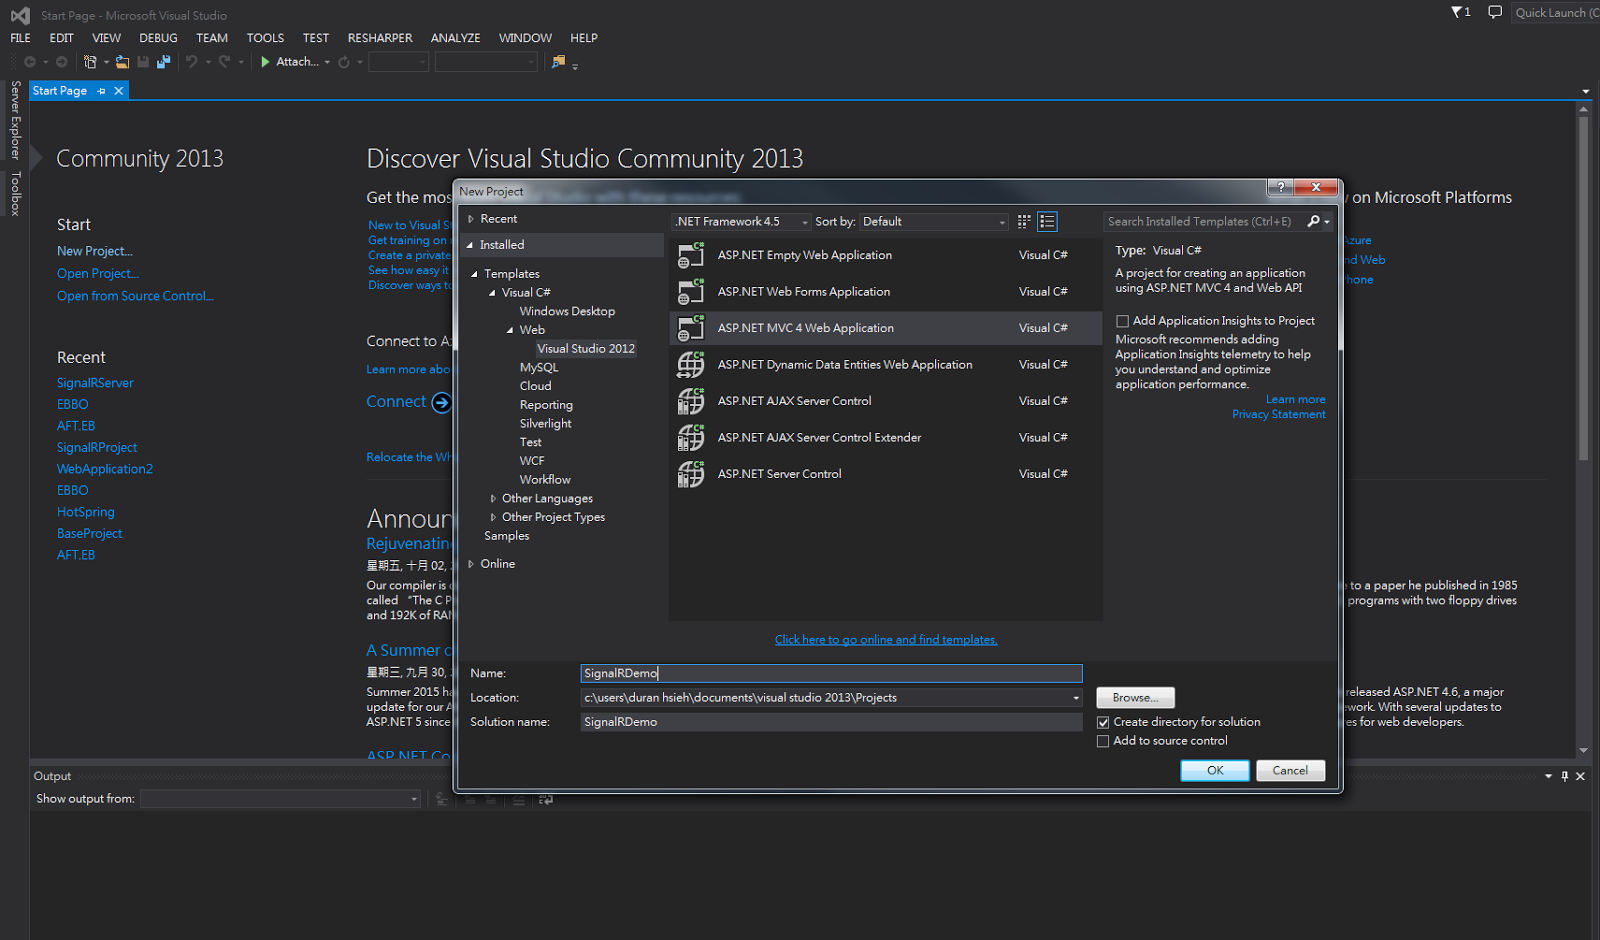
Step 1首先我們先開啟新專案,選擇ASP .NET MVC 4 Web Application
專案名稱為 SignalRDemo
File => New Project => ASP .NET MVC 4 Web Application
Name is SignalRDemo
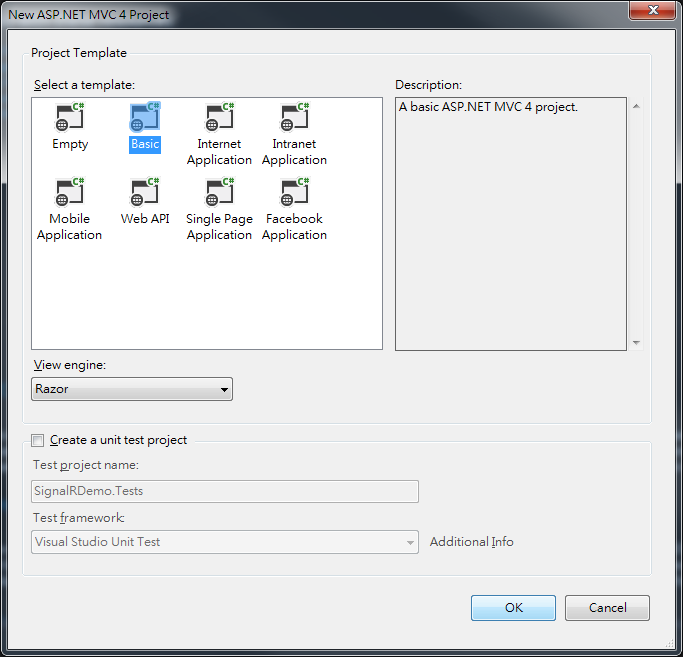
Step 2 專案樣板選擇Basic
Project Template : Basic
Step 3 展開專案,右鍵點選 References,選擇 Manage NuGet Package...
Expand Project, right click Reference, Select Manage NuGet Package...

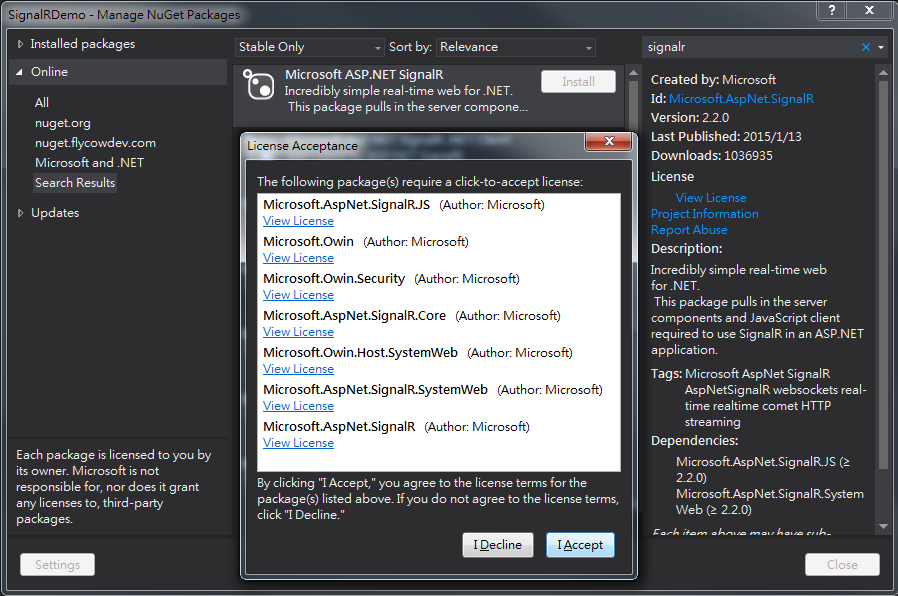
Step 4 搜尋列輸入signalr,找到Microsoft ASP.NET SignalR,點選Install
Search Package for signalr, and install Microsoft ASP.NET SignalR
Step 5 安裝完成後,你會看到Readme.txt(如下圖)。
After Installing SignalR package, you will see readme.txt(as below)

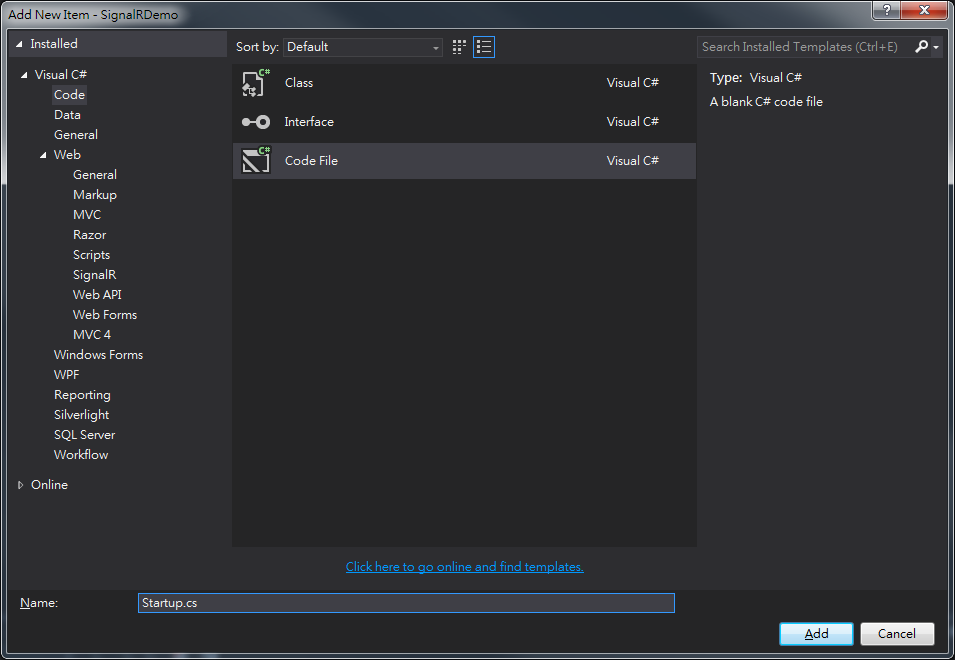
Step 6接下來要加入startup.cs。 右鍵點選專案 >> Add >> New Item...
I want to add "startup.cs" file. Right click project >> Add >> New Item...
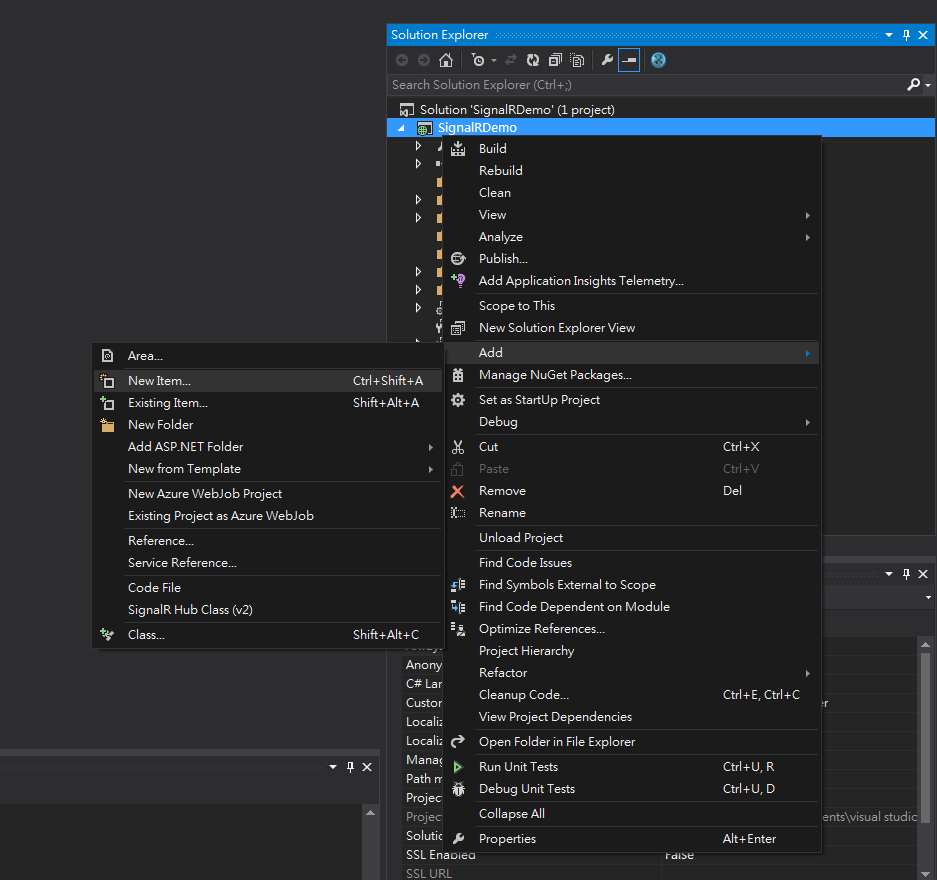
Step 7左邊面板選擇Code,選擇Code File,名稱為"startup.cs"
Select Code at left tab, and then select Code File, name "startup.cs"
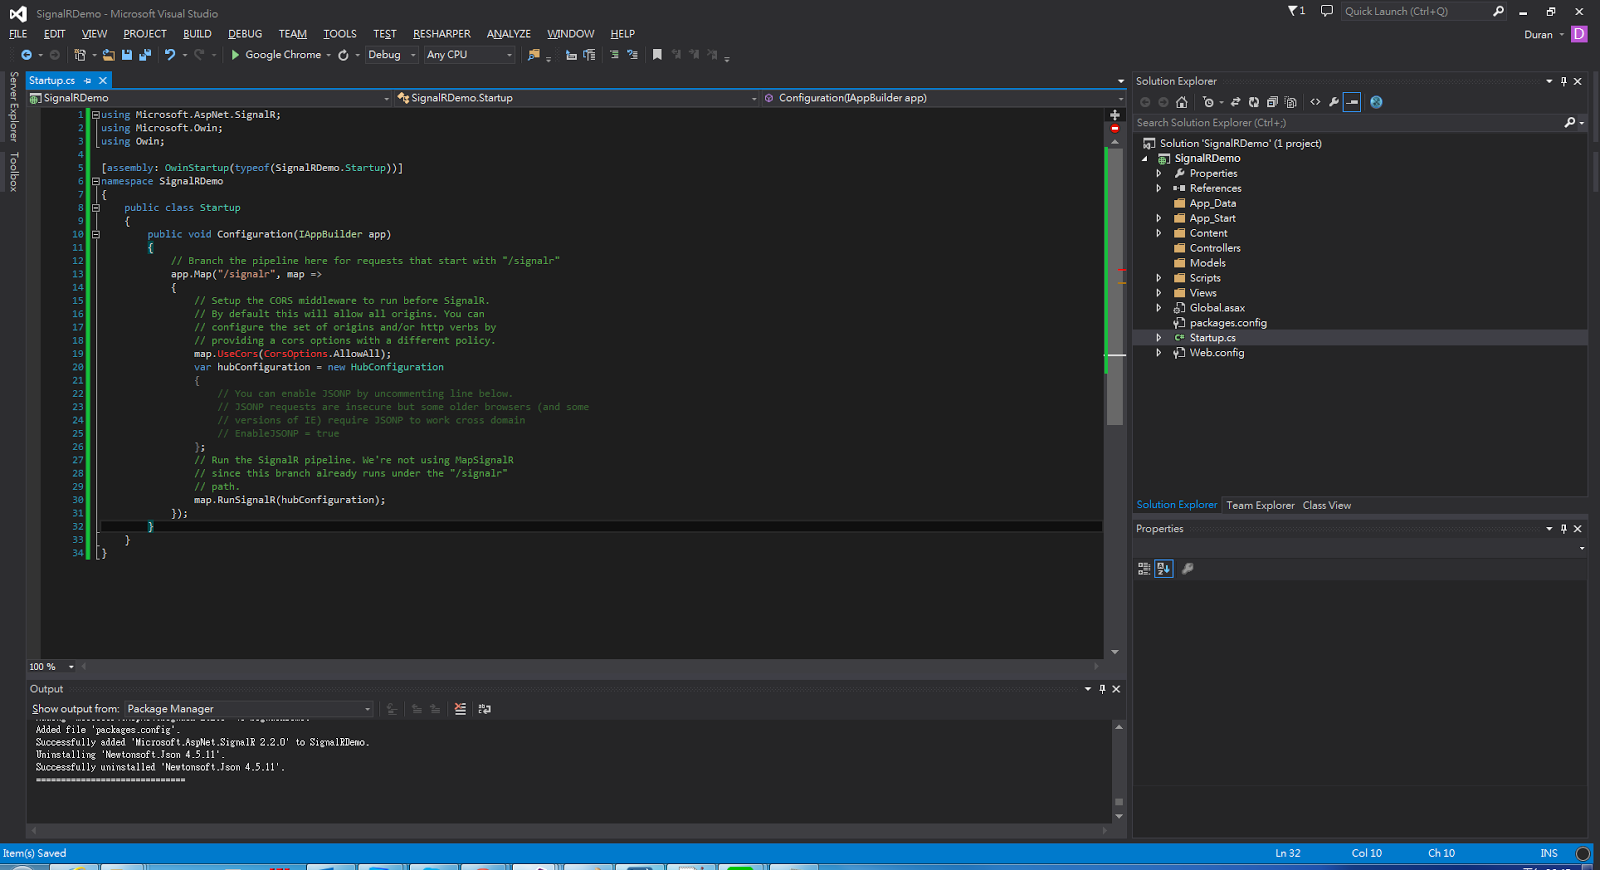
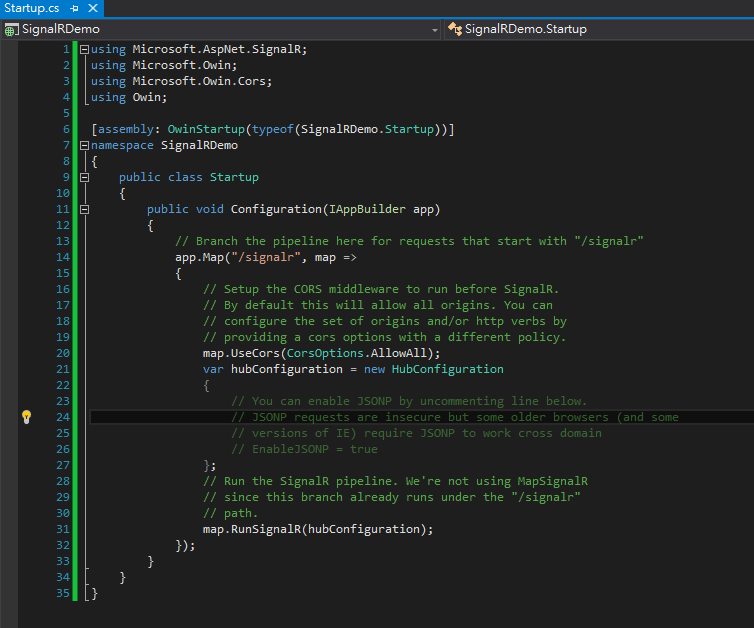
Step 8為了解決Cross Domain問題,我們在"startup.cs"中加入下列程式碼
In order to solve the "Cross Domain" problem, we add codes as below.
using Microsoft.AspNet.SignalR;
using Microsoft.Owin;
using Microsoft.Owin.Cors;
using Owin;

[assembly: OwinStartup(typeof(SignalRDemo.Startup))]
namespace SignalRDemo
{
    public class Startup
    {
        public void Configuration(IAppBuilder app)
        {
            // Branch the pipeline here for requests that start with "/signalr"
            app.Map("/signalr", map =>
            {
                // Setup the CORS middleware to run before SignalR.
                // By default this will allow all origins. You can
                // configure the set of origins and/or http verbs by
                // providing a cors options with a different policy.
                map.UseCors(CorsOptions.AllowAll);
                var hubConfiguration = new HubConfiguration
                {
                    // You can enable JSONP by uncommenting line below.
                    // JSONP requests are insecure but some older browsers (and some
                    // versions of IE) require JSONP to work cross domain
                    // EnableJSONP = true
                };
                // Run the SignalR pipeline. We're not using MapSignalR
                // since this branch already runs under the "/signalr"
                // path.
                map.RunSignalR(hubConfiguration);
            });
        }
    }
}
Step 9.安裝Microsoft.Owin.Cors 套件(Manage NuGet Package...)
Install Microsoft.Owin.Cors package(at Manage NuGet Package..)

Step 10套件安裝完成,無錯誤訊息。
After Installing package, there is no error message.
Step 11接下來,需要增加Signal Hub Class。
右鍵點選專案 >> Add >> New Item...
Next, I want to add Signal Hub Class in SignalRDemo Project
Right click project >> Add >> New Item...

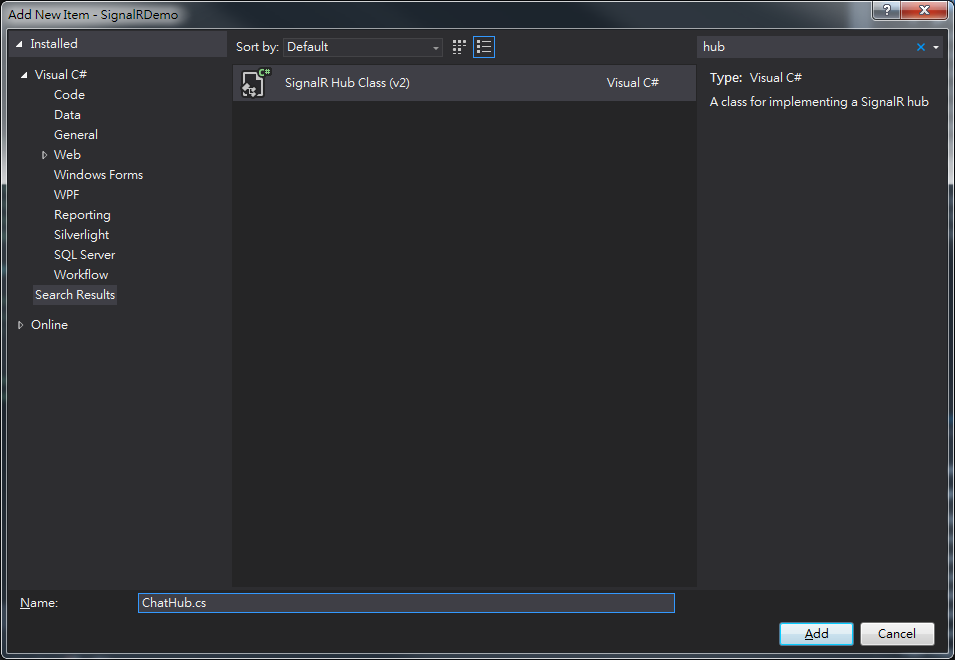
Step 12在新增項目中,使用關鍵字查詢hub,選擇Signal Hub Class (v2),名稱ChatHub.cs
Search at "add new item" for keyword "hub", Select Signal Hub Class (v2), name ChatHub.cs
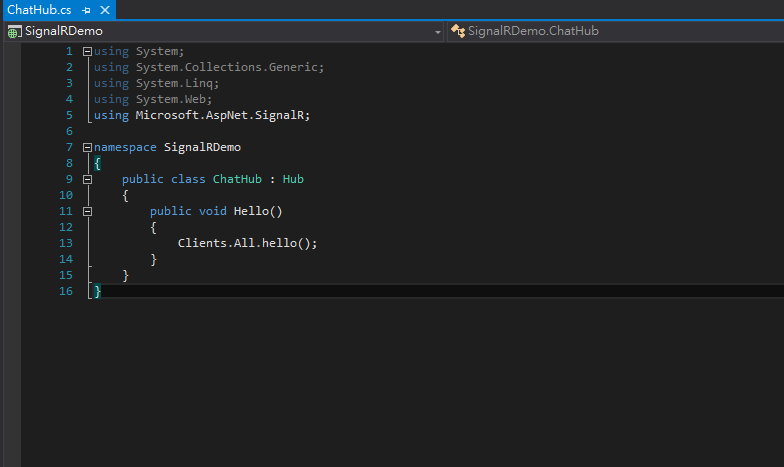
Step 13 新增後畫面
After adding ChatHub.cs, you will see the file as below.
Step 14嘗試啟動專案..
Start the project..

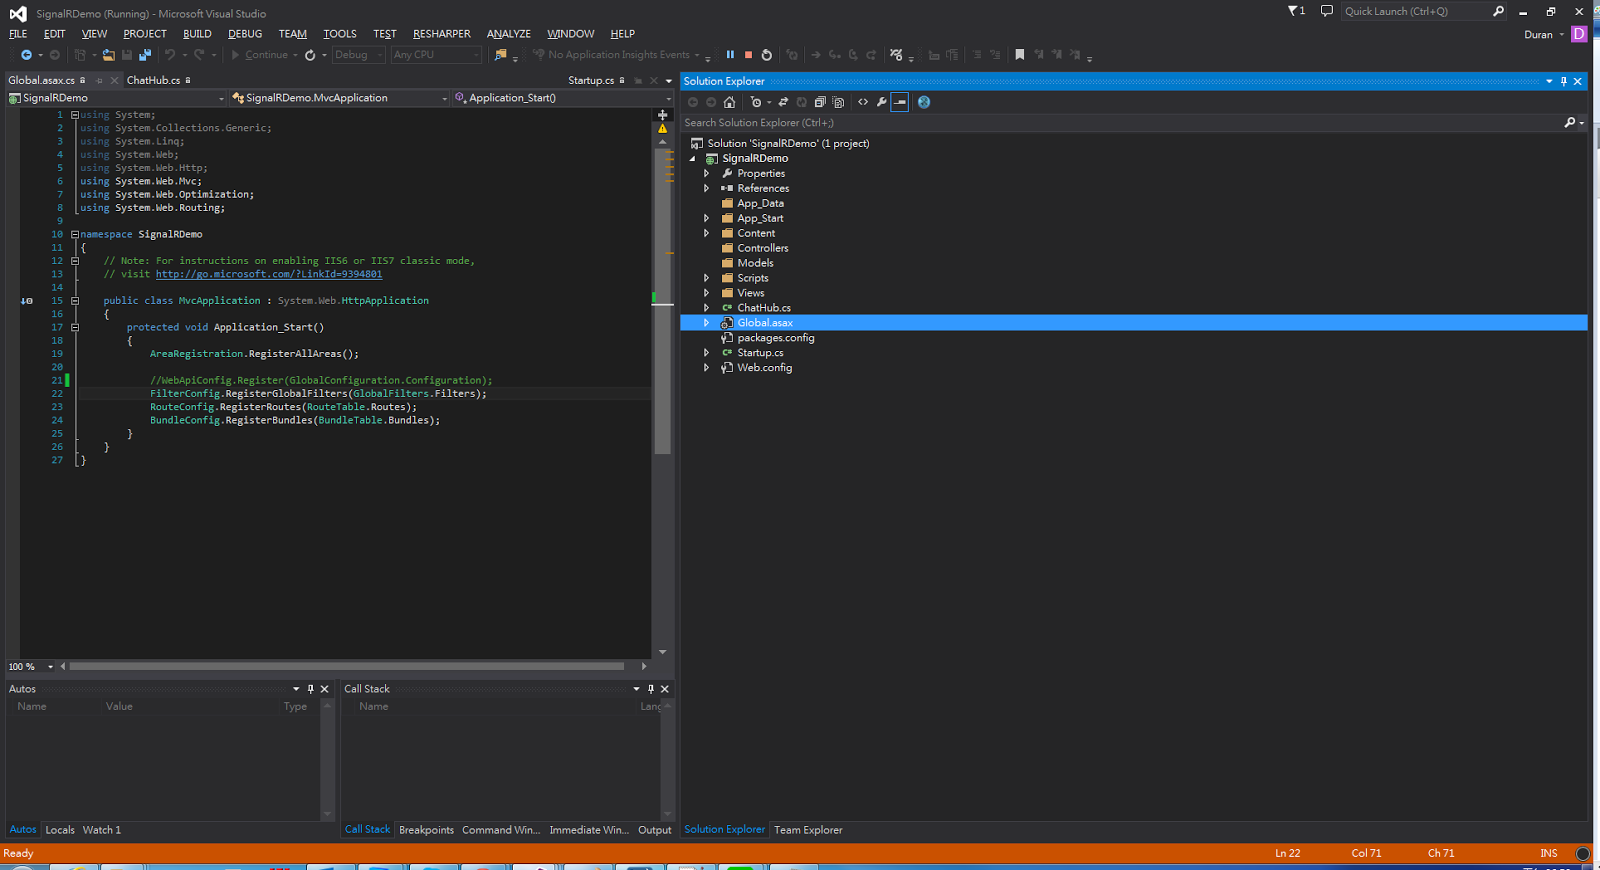
Step 15 如果有發生錯誤,嘗試將Global.asax中WebApiConfig.Register...註解或刪除
if error, try to delete "WebApiConfig.Registe" in Global.asax
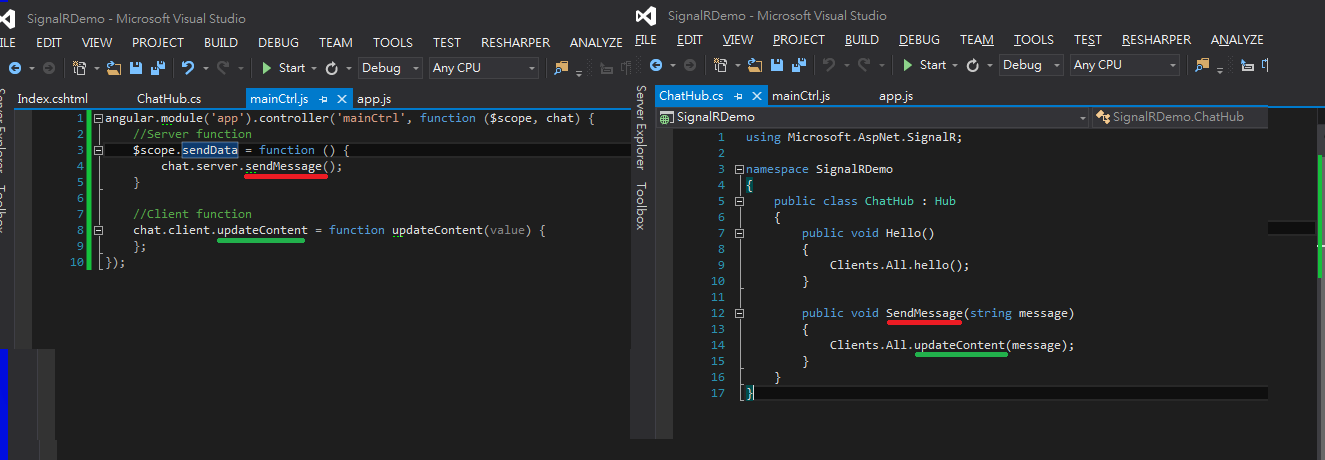
Step 16先加入一些方法(如下圖),之後會需要用到
Adding new method "SendMessage()"(as below), it will be used later.

前端專案設定
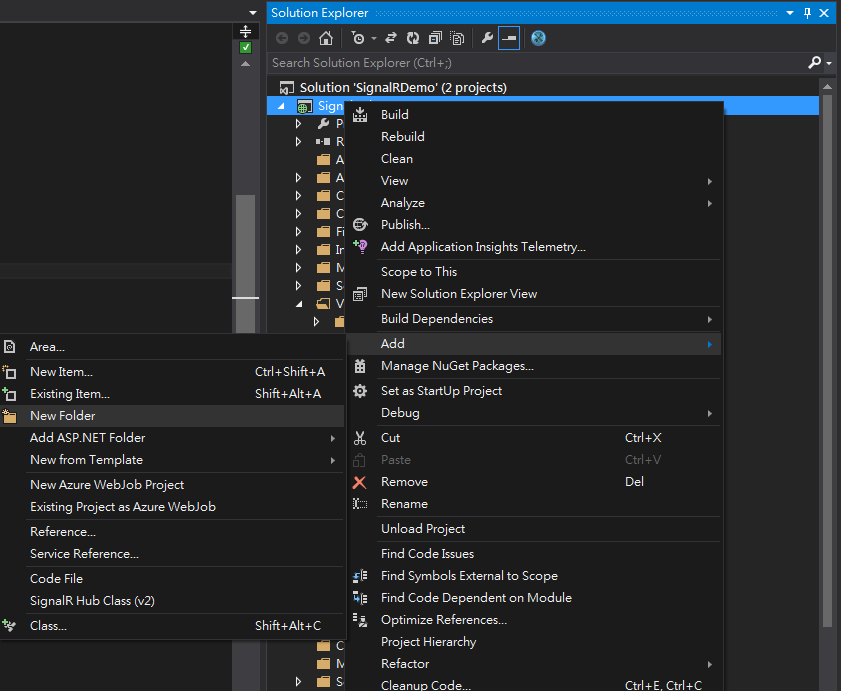
Step 1接下來,開啟一個新的專案(前端)右鍵點選方案 >> Add > New Project...
Open New Project(for front end)
Right click Solution >> Add >> New Project

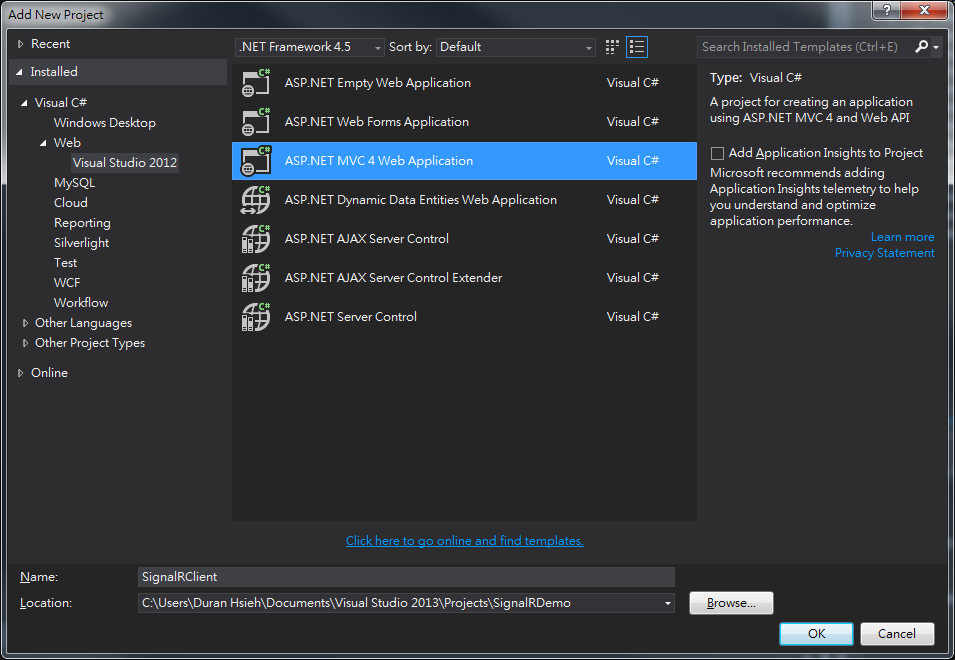
Step 2選擇ASP .NET MVC 4 Web Application
專案名稱為 SignalRDemo
ASP .NET MVC 4 Web Application
Name is SignalRClient
Step 3專案樣板選擇 Internet Application
Project Template : Internet Application

Step 4設定起始專案:右鍵點選solution >> properties
Setting startup project: right click solution >> properties

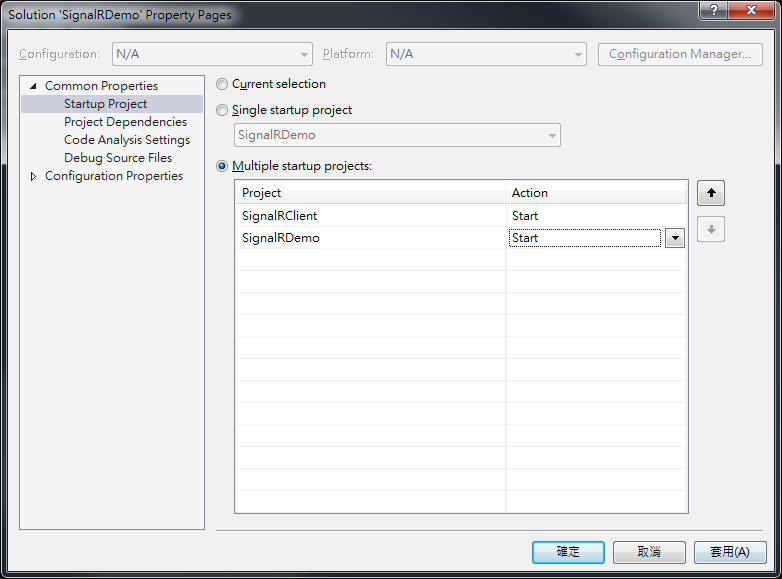
Step 5選擇Multiple startup projects,將SignalRClient與SignalRDemo設定Start(如下圖)
Select Multiple startup projects, set action of SignalRClient and SignalRDemo to Start
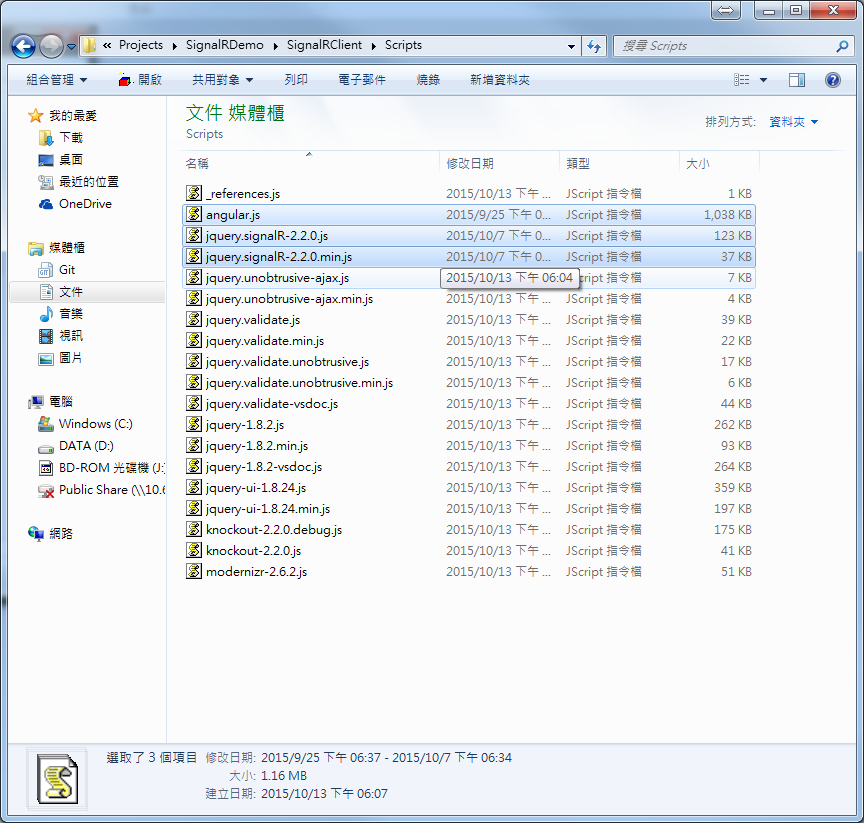
Step 6複製angluar.js, jquery.signalR-2.2.0.js, 與 jquery.signalR-2.2.0.min.js到
(Project Path)/SignalRDemo/SignalRClient/Scripts下
Copy angluar.js, jquery.signalR-2.2.0.js, and jquery.signalR-2.2.0.min.js to
(Project Path)/SignalRDemo/SignalRClient/Scripts
angluar.js: Download
You can find jquery.signalR-2.2.0.js and jquery.signalR-2.2.0.min.js in
(Project Path)/SignalRDemo/SignalRDemo/Scripts
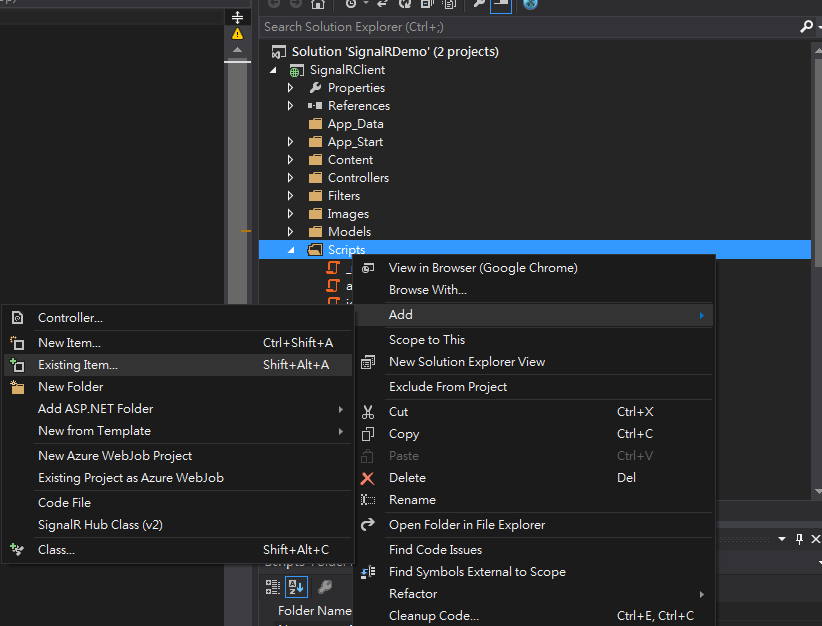
Step 7右鍵點選Scripts 資料夾,選擇Add >> Existing Item
Right click Scripts folder, select Add >> Existing Item
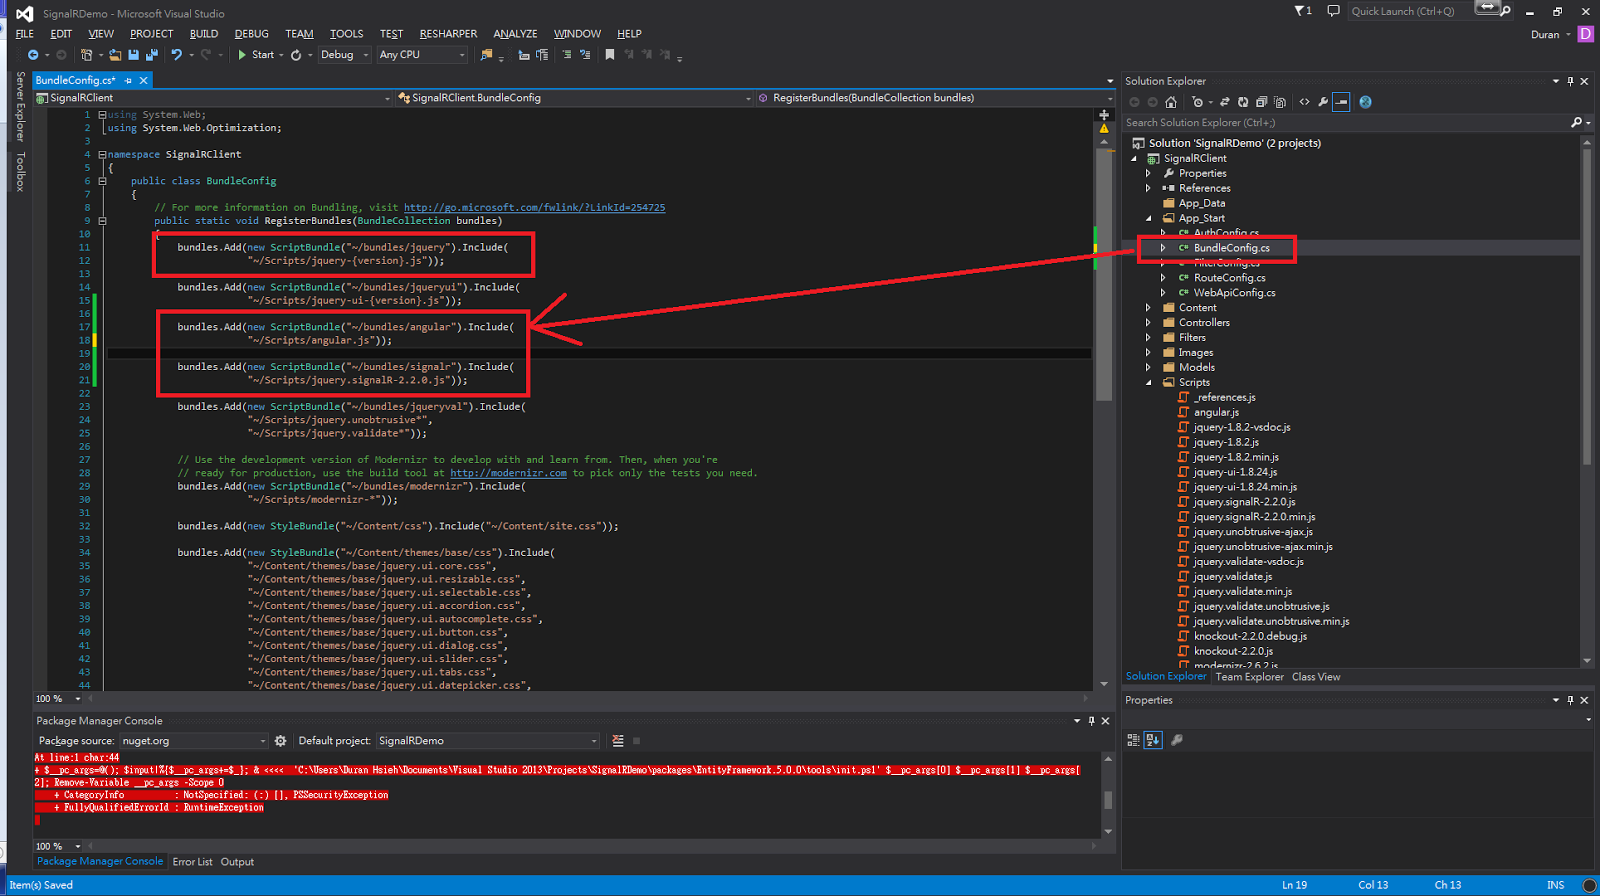
Step 8開啟App_Start/BundleConfig.cs,加入下列程式碼
Open App_Start/BundleConfig.cs, Add codes as below
bundles.Add(new ScriptBundle("~/bundles/jquery").Include(
            ~/Scripts/jquery-{version}.js"));
bundles.Add(new ScriptBundle("~/bundles/angular").Include(
            ~/Scripts/angular.js"));
bundles.Add(new ScriptBundle("~/bundles/signalr").Include(
            "~/Scripts/jquery.signalR-2.2.0.js"));
Step 9開啟View/Shared/_Layout.cshtml,加入下列程式碼
Open View/Shared/_Layout.cshtml, Add codes as below
    @Scripts.Render("~/bundles/jquery")
    @Scripts.Render("~/bundles/signalr")
    @Scripts.Render("~/bundles/angular")

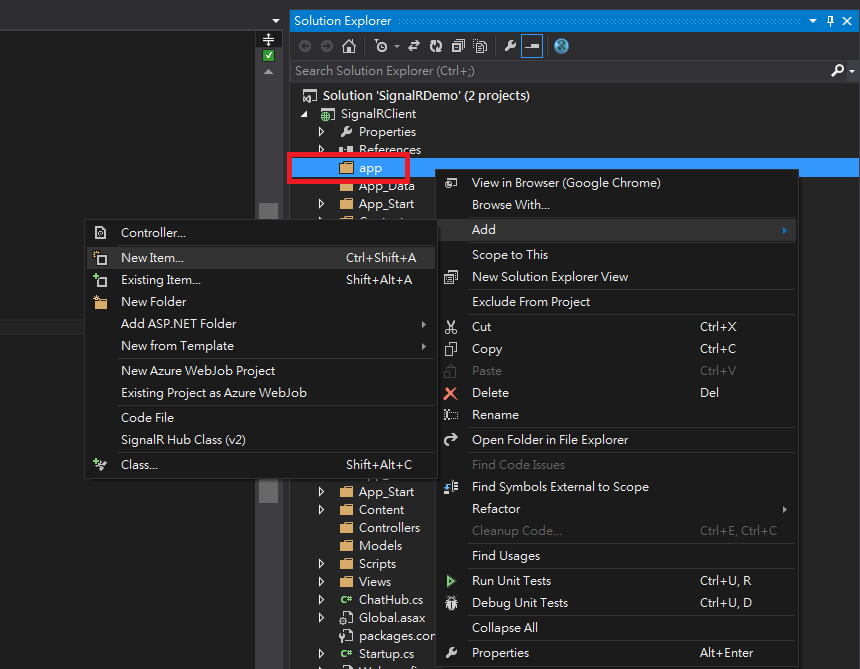
Step 10加入新的資料夾"app": 右鍵點選SignalRClient,選擇 Add >> New Folder
Add new Folder "app": Right click SignalRClient,Select Add >> New Folder
Step 11加入javascript 檔案:右鍵點選app資料夾,選擇Add >> New Item...
Add javascript file: Right click app folder, select Add >> New Item...
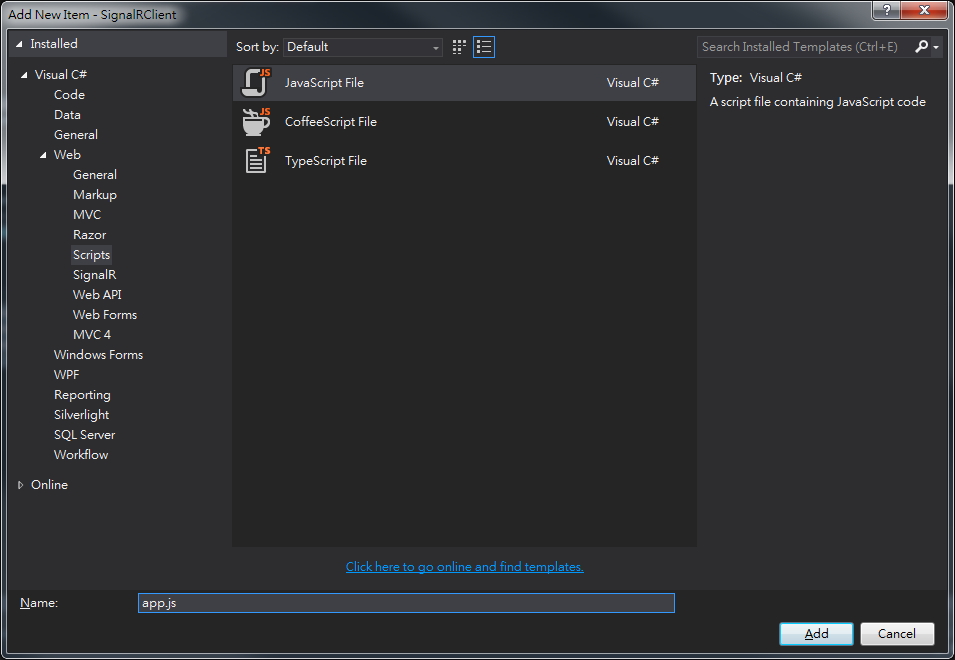
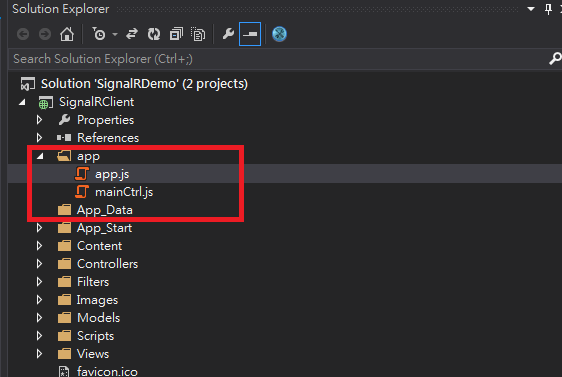
Step 12選擇Visual C# >> Web >> Script,選擇JavaScript File,名稱為app.js and mainCtrl.js
Select Visual C# >> Web >> Script, select JavaScript File, name are app.js and mainCtrl.js
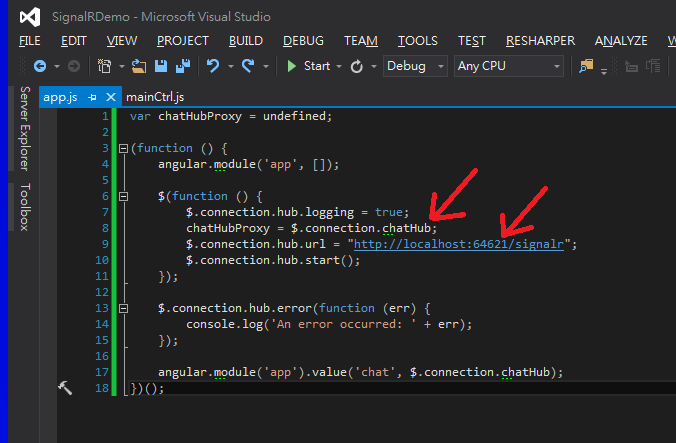
Step 13在app.js輸入下列的程式碼
Add codes as below in app.js
var chatHubProxy = undefined;

(function () {
    angular.module('app', []);

    $(function () {
        $.connection.hub.logging = true;
        chatHubProxy = $.connection.chatHub;
        $.connection.hub.url = "http://localhost:64621/signalr";
        $.connection.hub.start();
    });

    $.connection.hub.error(function (err) {
        console.log('An error occurred: ' + err);
    });

    angular.module('app').value('chat', $.connection.chatHub);
})();
注意 1:chatHub 必須與Hub class名稱相同,且第一個字為小寫
注意 2:在我的範例程式中,64621為SingalRDemo專案啟動時的Port,
請替換您專案的Port
Note 1: chatHub has to be the same as Hub class name , and first letter is lower case.
Note 2: In my demo project, 64621 is port of SingalRDemo Project, please replace 64621 with
your SingalRDemo project port)
Step 14在mainCtrl.js輸入下列的程式碼
Add codes as below in mainCtrl.js
angular.module('app').controller('mainCtrl', function ($scope, chat) {

    //Server function
    $scope.sendData = function () {
        chat.server.sendMessage($scope.enterValue);
        $scope.enterValue = "";
    }

    //Client function
    chat.client.updateContent = function updateContent(value) {
        $scope.currentValue= value;
        $scope.$apply();
        console.log(value);
    };
});
注意 1:Server/Client方法必須與Hub class的方法相同,且第一個字為小寫
Server/Client Method has to be the same as method of Hub class , and
first letter is lower case.
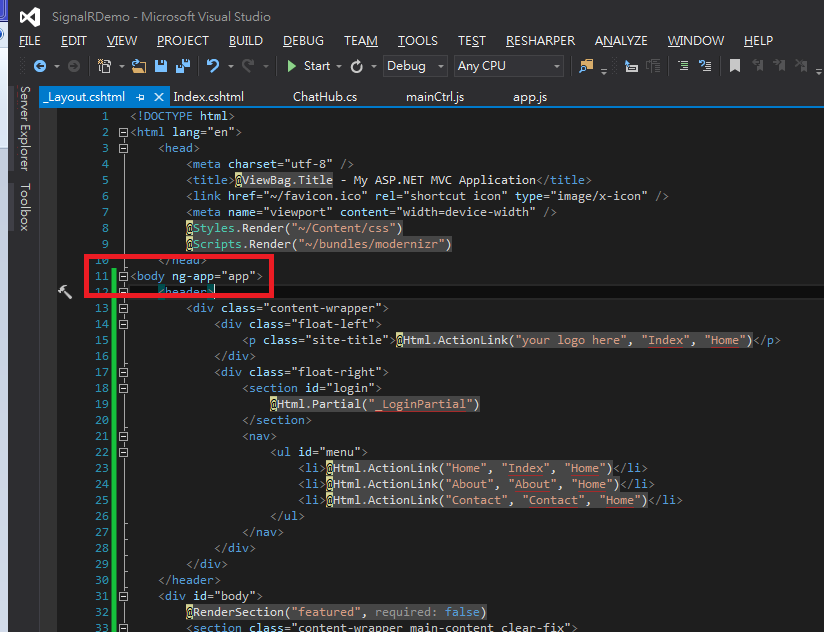
Step 15開啟_Layout.cshtml,在Body的Tag上增加 ng-app="app"
Open _Layout.cshtml, add ng-app="app" at body tag
Step 16開啟View/Home/Index.cshtml,加入下列程式碼
Open View/Home/Index.cshtml, Add codes as below
@{
ViewBag.Title = "Index";
}
Index
{{ currentValue }}

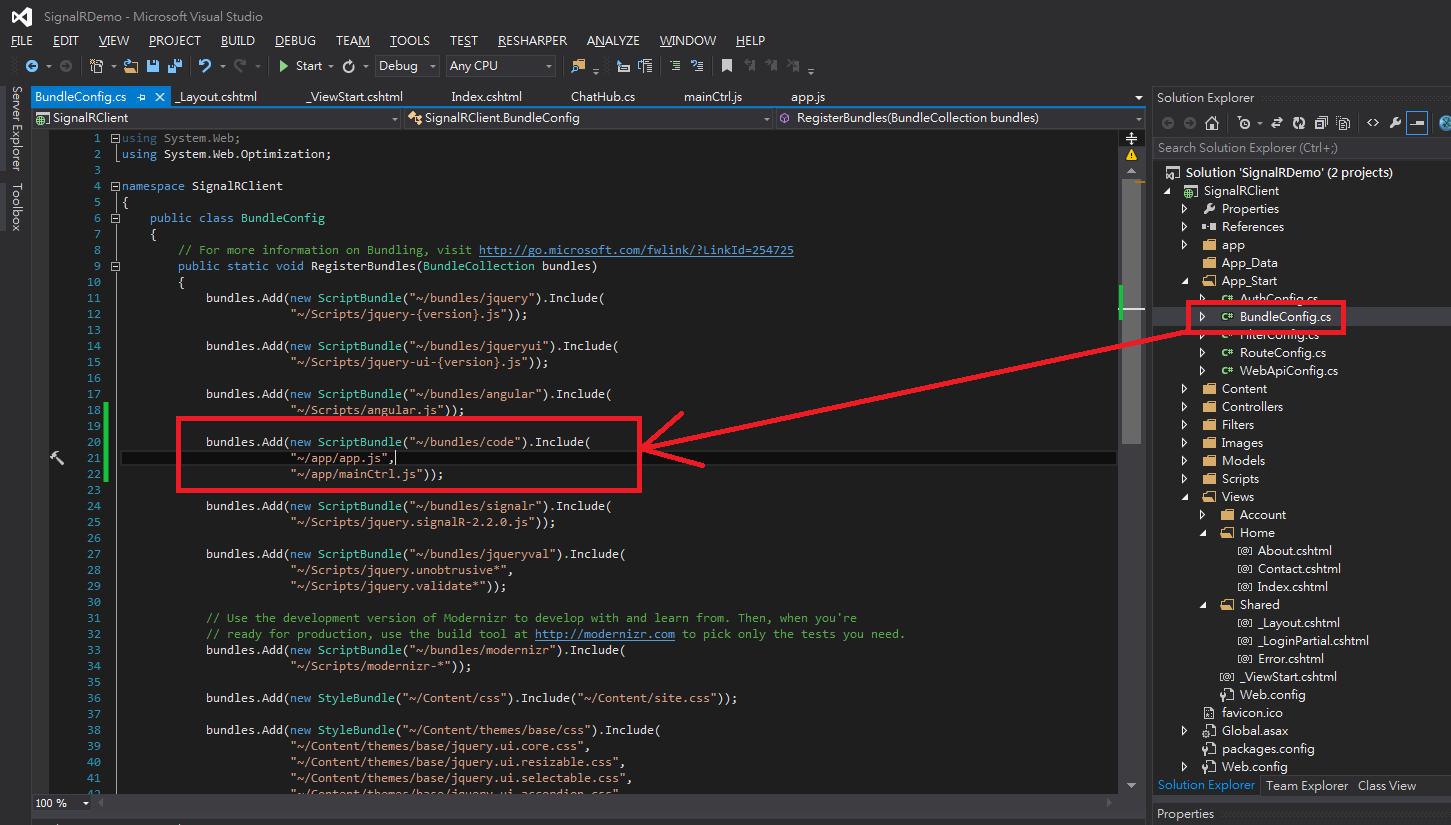
Step 17開啟App_Start/BundleConfig.cs,加入下列程式碼
Open App_Start/BundleConfig.cs, Add codes as below
            bundles.Add(new ScriptBundle("~/bundles/code").Include(
                        "~/app/app.js",
                        "~/app/mainCtrl.js"));
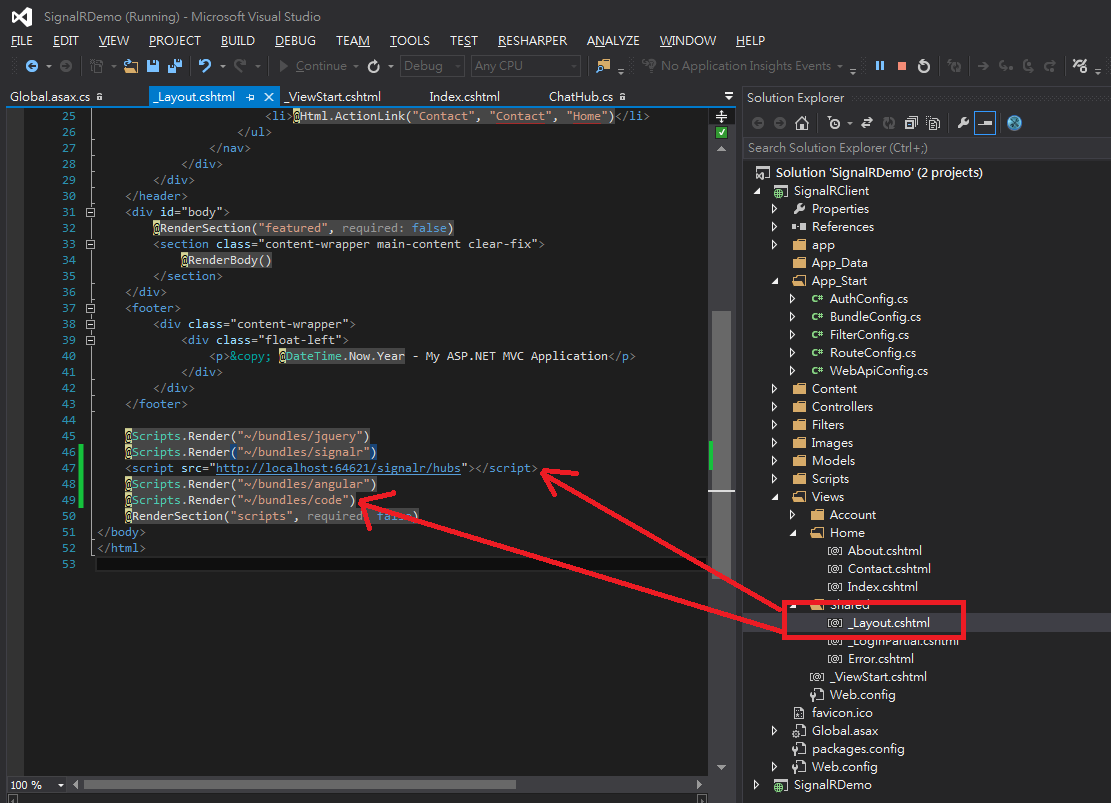
Step 18開啟View/Shared/_Layout.cshtml,加入下列程式碼
Open View/Shared/_Layout.cshtml, Add codes as below
...
    @Scripts.Render("~/bundles/angular")
注意:順序很重要
Note:The order is important
結果呈現
輸入資料,會顯示在畫面上;開啟兩個瀏覽器,在其中一個輸入,另一個會跟著變動。


更改程式碼如下圖,就會變成一個簡單的聊天室,您可以擴充功能讓這個聊天室更完整。


範例下載:
https://dl.dropboxusercontent.com/u/13585157/SignalRDemo.zip感想:
這篇文章是較詳細的步驟說明,並沒有談到相關原理,若對於原理與使用方式需要更進一步的了解,可以前往SignalR | The ASP.NET Site 。
整個SignalR的專案製作起來相當有趣,且Real time應用範圍相當廣,可以製作有趣
的應用程式或遊戲。另外,除了後台必須是.Net的環境外,JavaScript就可以用在很多
不同平台的網站上,相當方便。
在我工作的專案上,另外還做了幾個簡單應用:
- 建立連線的時候取connectionid,傳送特定資料給特定client。
- 使用WebAPI執行Hub方法。
有興趣的朋友也可以試試看。
參考資料:
1.pluralsight : AngularJS for .NET Developers - Real Time Communication with SignalR2.SignalR | The ASP.NET Site
3.Microsoft Virtual Academy : Lighting Up Real-Time Web Communications with SignalR
--
謝謝!


0 留言